CERTIFIED TEXAS EXPERT GARDENER — Rejuvenating potting soil is fun gardener’s approach
Published 12:02 am Thursday, November 23, 2023
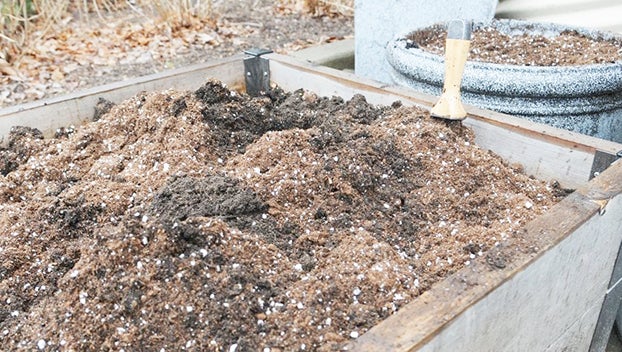
- Used potting soil, once sterilized, should be screened to remove debris, i.e., roots, twigs, leaves, stems and other dead plant material before adding organic soil amendments, macro nutrients and slow-release fertilizers to super-charge and reinvigorate used potting soil. (gardeners.com)
|
Getting your Trinity Audio player ready...
|
Thanksgiving has once again passed us by, and my hope is each of you enjoyed quality time with family and friends, and that a traditional bounty was served, as a remembrance of our historical past and harvest.
My family is thankful and fortunate to host family members from near and far (Brownsville and Dortmund, Germany), building more pleasant memories of togetherness. These memories build the ties that bind us as families.
Our area has once again received some rainfall this past week, occurring over several days then followed by cooler temperatures. A welcome relief (though slight), much needed by trees and shrubs that are stressed due to recent environmental pressure.
Summer’s almost endless, record-breaking extreme temperatures and severe drought have caused much damage. Perhaps our trees can rebound from these environmental hurdles, which cannot be repaired within one or two seasons but will require several seasons or perhaps years to repair damage from our seasonal extremes.
We need our climate to stabilize with a return to a semblance of normalcy. Climate change is real folks —our local climate is changing with extreme weather patterns as the new normal.
Let’s move on to today’s topic. Readers have asked: Can “used” potting soil can be revitalized?
Short answer-absolutely, though gardeners need specific details to minimize problems when rejuvenating growing mediums, i.e., soil pathogens. Before digging into today’s topic (yes, gardening pun is intended…again!), we will discuss soil sterilization, which is sometimes challenging depending on the method chosen to remove the pests and other and clandestine microbes!
There are two approaches a gardener can take to sterilizing potting soil. One method (least favorable but quickest) is malodorous, requiring the soil to be ‘baked’ inside an oven (200F) for 30 to 45-minutes, or inside a microwave oven (2-minutes).
Speaking from experience, I don’t recommend this method due to the lingering odors. The second (preferred method), takes considerably longer (4 to 6-weeks) but utilizes the sun’s radiance to destroy the undesirables.
Place a small amount of used potting soil into a dark colored container (trash bag or 5-gallon bucket), and cover. Place container in a shiny location where the containers internal temperature will increase thus killing harmful pests in the soil.
Remove plant debris from the sterilized soil: leaves, roots, weeds, rocks, and other unwanted plant parts. Manually remove debris by picking through the soil or using a ¼ to ½-inch mesh screen for easier, and more timely debris removal.
I use a mess screen placed over a wheelbarrow. Adding small, incremental amounts of soil to the screen, then with gloved hands, simply rub the screen surface back and forth over the soil until it filters through leaving large debris to be added to the compost.
Gardeners, remember that organic matter ‘freshens’ used potting soil which can be accomplished in several ways using multiple soil amendments, such as humus, worm castings, vermicompost, composted livestock manure, decomposed compost, mushroom compost, leaf mold and others.
The number of amendments needed to ‘perk-up’ the used potting soil is directly correlated to the amount of used soil (volume) to be rejuvenated, and in this gardener’s opinion there more is more! Add as many soil amendments as you have on hand, as each will benefit the soil by improving soil aeration, increasing water retention and capacity, while reducing mineral (salt) build up.
Soil quality of ‘used’ potting soil can be increased with the addition of blood and bone meal. Both product types have elevated organic macro-nutrients, such as nitrogen (N), phosphorus (P), potassium (K), the primary building blocks, but also contain trace minerals (micronutrients) as well.
Add your personal selection of soil amendments, and blood meal to the wheelbarrow containing the sterilized soil. Mix the amendments and spoil together thoroughly, incorporating the organic matter using a hoe, garden spade or shovel.
Add a gallon of two of water, then continue mixing. For an added nutrient punch add approximately a tablespoon of time-released fertilizer per gallon of potting soil mix. Viola, the once spent potting soil is now ready to once again super charge plants providing them the nutrients needed for optimal growth.
Gardeners here are a few more points to ponder before utilizing rejuvenated potting soil:
- Thoroughly clean & disinfect pots and other planting containers.
- Remove extraneous dirt & debris from planting containers before submerging each individual container into a bleach solution (ratio of 1:10- bleach to water).
- Thoroughly rinse each container individually, to remove bleach solution.
- Do not double stack containers or place them inside one another while drying. Allow each container to air dry completely, especially porous containers, i.e., terra cotta, before returning rejuvenated soil to them!
- If the plant containers’ previous resident died from disease, my suggestion is to use another container, particularly if the container is porous.
Used potting soil known to have some type of soil born disease, pathogens or pests is best discarded. In this gardeners opinion, it’s not worth the effort to rejuvenate the soil nor the increased exposure of risk to future plants.
So long for now fellow gardeners. Let’s go out and grow ourselves a greener, more sustainable world, one plant at a time.
Send Certified Texas Expert Gardener John Green your questions and please continue sending comments to jongreene57@gmail.com.